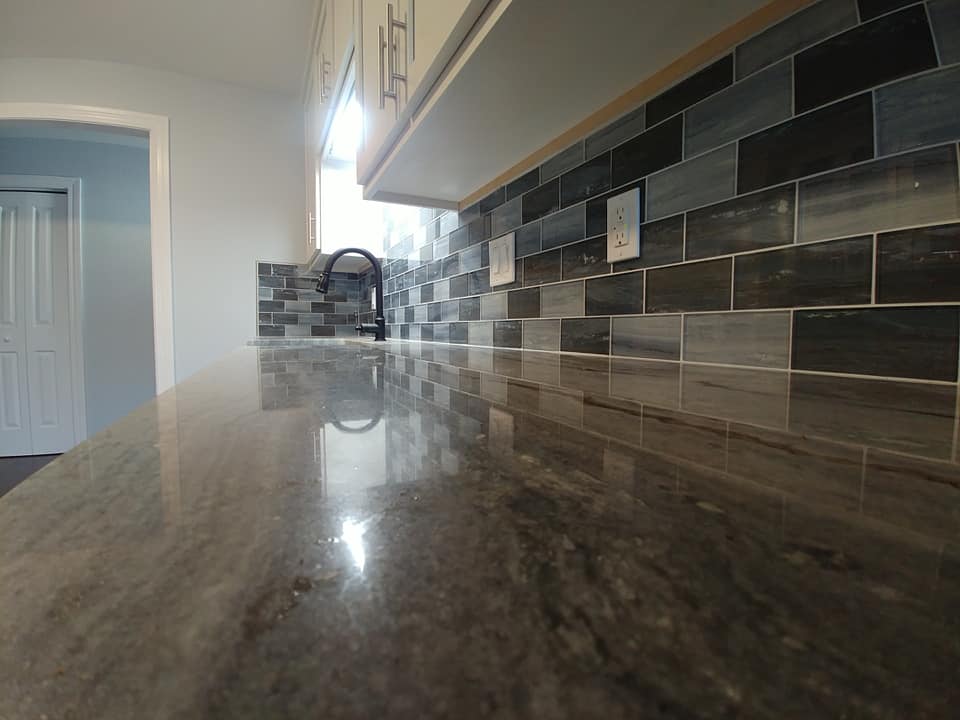
Adding a back splash gives your kitchen that final touch. Think on your material and color scheme first. Installing various back splash materials, such as paint or wallpaper, stainless steel sheets, glass and stone tiles, is nothing new for our skilled handy men.
Backsplashes Can Add the Finishing Touch to a Kitchen
Not only do you spend a lot of time in the kitchen, but remodeling it is also one of the simplest methods to raise the value of your house. For these reasons, the kitchen is one of the most significant rooms in your house.
If you’d want to give your kitchen and dining area a little update without completely remodeling, you might want to think about adding a new backsplash. That alone has the power to completely change the space.
What Is a Kitchen Backsplash?
The purpose of a backsplash in the kitchen is to shield your walls from frequent kitchen stains and food spills. They also let homeowners give their kitchen a unique flair and individuality.
Since spills frequently occur behind the stove and countertop, a backsplash is usually placed right behind them. Your budget, preferred style, and general kitchen aesthetic will all influence the height and length of your backsplash. Certain backsplashes are only four inches high, keeping spills from wetting the wall behind the counters. The majority of backsplashes ascend to the cabinet’s end. For the whole “tiled look,” others can extend all the way to the ceiling.
How to Tile a Kitchen Backsplash
- Determine the size of the backsplash and choose your tile: Measure the space and precisely identify the location of the backsplash installation. Based on your dimensions, choose the kind of backsplash tile you want and buy the right quantity to cover the measured area. We advise buying extra tile because you might need more to fill up any gaps.
- Get ready to install: Take everything off of your countertops and cover them with cardboard or plastic wrap. Ensure that any countertop appliances are unplugged and that the electricity to the area you will be working on is turned off. Take off all of the outlet covers, then use a light soap to clean the walls.
- Make a mark in the area where the tile will go: Verify that each tile is even and level. The tile may need to be cut to fit, depending on where you start.
- After applying the backsplash cement, place the tile: Apply a thin coat to the wall or walls after mixing your mortar in a bucket according to the instructions. You will only have a short window of time (about four hours) after mixing the mortar before it sets. After applying, firmly push the tile into place. To keep the mortar from drying out before the tile is put, apply the mortar in tiny parts rather than covering the entire wall.
- Dry and pre-seal the tile: Give the tile a full day to dry completely after installing it all the way. If the manufacturer specifies tile sealing, use one after it has cured to avoid discoloration. A few hours before grouting, let it dry and give it a quick clean down with water and a sponge.
How to Grout a Kitchen Backsplash
The next stage after preparing, laying, cleaning, sealing, and wiping off tile is grouting the kitchen backsplash:
- Mix the grout: You need to prepare your grout after giving the tile one last sponge clean. You have a few options when it comes to grout. Think about using sanded grout for thicker tiles and non-sanded grout for thinner tiles. To mix your grout, follow the instructions; however, most mixes require blending with water and then need to sit for around ten minutes to thicken.
- Tile grouting: Work in tiny parts, just as with mortar, and use a grout float to apply grout to the tile, wiping away any extra grout that didn’t complete the grout lines as you go. Use the float to apply it at a 45-degree angle. Always consult the manufacturer’s directions since grout cure times vary. In general, after applying the grout, wait a few hours and use a damp sponge to remove any residue that may have gotten on the tile. This allows the grout to have time to dry in between the tiles. To remove extra grout that has collected on the sponge, make sure you wet and wash the cloth often.
- Clean and seal the tile: To prevent further stains, add a sealer to the grout once it has dried (this process takes at least 24 hours, depending on the kind of grout and tile used). Use a non-acidic cleaner to give the tile one last cleaning. Reinstall outlet covers and appliance covers, then turn the electricity back on.
Backsplash Repair or Replacement
Our skilled handymen can assist if your backsplash needs to be replaced or if it is damaged. We will assess the damage and work with you to determine the best course of action. If repairs are necessary, we’ll make it appear as though nothing occurred. If you need your backsplash replaced, we will handle every step of the procedure.
Professional Backsplash Installation
As one of the most dependable handymen in Pensacola, you can rely on us to complete the task correctly the first time. Our repair services are intended to let you relax and enjoy your home by checking tasks off your to-do list. Simply give our experts a call to talk about your kitchen design ideas.